Search Results
Search Results
Search Results
175 results found with an empty search
- Machine Learning in SQL Server
Machine Learning in SQL Server refers to the integration of machine learning algorithms and techniques into the Microsoft SQL Server database management system. This allows data analysts and developers to use machine learning models to extract insights from large datasets and make predictions. SQL Server Machine Learning Services (SQL Server ML Services) is a feature that enables the integration of R and Python language with SQL Server. It provides data analysts and developers with a platform to create and deploy machine learning models directly in SQL Server. This means that they can analyze large datasets within the same database where the data is stored, without having to extract or move the data to another platform. SQL Server ML Services supports popular machine learning libraries, including Microsoft's ML.NET, TensorFlow, and Keras. This enables users to leverage existing machine learning models or develop their own custom models to solve a range of business problems. With Machine Learning in SQL Server, users can create predictive models for forecasting, identifying anomalies, and detecting fraud, among other applications. The integration of machine learning with SQL Server also provides users with a scalable, secure, and reliable platform for machine learning tasks, with built-in tools for monitoring, management, and integration with other applications. Here are some features of Machine Learning in SQL Server: Integration with SQL Server: Machine Learning in SQL Server allows data analysts and developers to use the same database platform for storing data and running machine learning models. Support for multiple languages: SQL Server Machine Learning Services supports multiple programming languages, including R and Python, which are widely used in the data science and machine learning communities. Scalability: Machine Learning in SQL Server can be scaled horizontally by adding more nodes to a cluster, allowing large-scale data processing and machine learning tasks. Security: SQL Server has built-in security features to protect data and prevent unauthorized access. Machine Learning in SQL Server leverages these features to ensure secure and safe machine learning operations. Built-in algorithms: SQL Server includes several built-in machine learning algorithms, such as decision trees, clustering, and regression, which can be used for various machine learning tasks. Integration with external libraries: Machine Learning in SQL Server supports external libraries such as TensorFlow, Keras, and ML.NET, providing users with a broad range of machine learning options. Real-time scoring: Machine Learning in SQL Server allows for real-time scoring, enabling users to make predictions and recommendations on the fly based on incoming data. Model deployment: SQL Server Machine Learning Services includes tools for deploying machine learning models, making it easy to integrate models with other applications and services. Integration with Azure Machine Learning: Machine Learning in SQL Server can be integrated with Azure Machine Learning, providing users with a cloud-based machine learning platform for building and deploying models. Monitoring and management: SQL Server includes tools for monitoring and managing machine learning models, allowing users to track model performance, diagnose issues, and adjust models as needed. What are R and Python R and Python are popular programming languages that are widely used in data science and machine learning. R is an open-source language and environment for statistical computing and graphics. It provides a wide range of statistical and graphical techniques, and is commonly used for data analysis, data visualization, and machine learning. R has a vast collection of libraries and packages that are designed specifically for data science, making it a powerful tool for statistical analysis. Python, on the other hand, is a general-purpose programming language that can be used for a wide range of applications, including web development, game development, and machine learning. Python has a large and active community, with many libraries and frameworks designed for data science, such as NumPy, Pandas, and TensorFlow. Python is known for its ease of use, readability, and simplicity, making it a popular choice among beginners. Both R and Python have their strengths and weaknesses, but they are both widely used in data science and machine learning. The choice of which language to use often depends on the specific application and the preferences of the user. Some data analysts and developers prefer R for its statistical capabilities, while others prefer Python for its flexibility and ease of use. Here are the download links for R and Python: R: Windows: https://cran.r-project.org/bin/windows/base/ Mac: https://cran.r-project.org/bin/macosx/ Linux: https://cran.r-project.org/bin/linux/ Python: Windows: https://www.python.org/downloads/windows/ Mac: https://www.python.org/downloads/mac-osx/ Linux: https://www.python.org/downloads/source/ Note that there are different versions of R and Python available, so make sure to download the version that is compatible with your operating system and requirements. Also, keep in mind that these download links may change over time, so it's always best to check the official websites for the latest downloads. How are R and Python Integrated Into SQL Server R and Python can be integrated into SQL Server through the SQL Server Machine Learning Services feature. This feature enables data analysts and developers to run R and Python scripts directly inside SQL Server, allowing them to build machine learning models and perform data analysis tasks within the same database environment. Here are the steps to integrate R and Python into SQL Server: Install SQL Server Machine Learning Services: The first step is to install SQL Server Machine Learning Services, which includes the necessary components to run R and Python scripts. Configure SQL Server to run R and Python: After installation, you need to configure SQL Server to run R and Python scripts. This involves setting up the correct permissions, enabling external scripts, and configuring the launchpad service. Write R and Python scripts: With SQL Server configured, you can write R and Python scripts that perform machine learning tasks or data analysis. These scripts can access data stored in SQL Server, and you can use familiar R and Python libraries and frameworks to build models and perform analysis. Execute R and Python scripts in SQL Server: Once you have written the scripts, you can execute them directly in SQL Server. SQL Server provides several stored procedures and functions that allow you to call R and Python scripts and retrieve the results. Deploy R and Python models: You can also deploy R and Python models directly in SQL Server, making it easy to integrate models with other applications and services. Overall, integrating R and Python into SQL Server provides a unified platform for data analysis and machine learning, allowing users to take advantage of the strengths of each tool while working within a familiar database environment. What are ML.NET, TensorFlow, and Keras ML.NET, TensorFlow, and Keras are all popular machine learning libraries and frameworks that are widely used by data scientists and machine learning engineers. ML.NET: ML.NET is an open-source, cross-platform machine learning framework for .NET developers. It enables developers to create custom machine learning models using C# or F# without requiring expertise in data science or machine learning. ML.NET supports various machine learning tasks such as classification, regression, clustering, and recommendation systems. TensorFlow: TensorFlow is an open-source machine learning library developed by Google. It provides a platform for building and training machine learning models, with support for deep learning, reinforcement learning, and other types of machine learning algorithms. TensorFlow can be used with Python, R, and other programming languages. Keras: Keras is a high-level neural network API that runs on top of TensorFlow. It provides a simple and easy-to-use interface for building and training deep learning models, making it a popular choice for beginners and experts alike. Keras supports various neural network architectures, including convolutional neural networks (CNNs), recurrent neural networks (RNNs), and more. All three libraries and frameworks are powerful tools for building and training machine learning models. The choice of which library or framework to use often depends on the specific requirements of the project and the expertise of the data scientist or machine learning engineer. Here are the download links and more information about each library/framework: ML.NET: Download link: https://dotnet.microsoft.com/apps/machinelearning-ai/ml-dotnet ML.NET is a free, open-source, cross-platform machine learning framework developed by Microsoft. It enables .NET developers to easily build custom machine learning models using C# or F#. ML.NET supports a variety of machine learning tasks, including binary classification, multiclass classification, regression, clustering, anomaly detection, and recommendation systems. TensorFlow: Download link: https://www.tensorflow.org/install TensorFlow is an open-source machine learning library developed by Google. It provides a platform for building and training machine learning models, with support for deep learning, reinforcement learning, and other types of machine learning algorithms. TensorFlow can be used with various programming languages, including Python, C++, Java, and more. Keras: Download link: https://keras.io/#installation Keras is a high-level neural network API that runs on top of TensorFlow. It provides a simple and easy-to-use interface for building and training deep learning models, making it a popular choice for beginners and experts alike. Keras supports various neural network architectures, including convolutional neural networks (CNNs), recurrent neural networks (RNNs), and more.
- SQL GROUP BY to Summarize and Rollup Query Results
What Is “Grouping” In SQL, And Why Is It Needed? Grouping in SQL group together is a powerful concept that allows us to group rows of data into one group, or more combinations and summarize the numeric values contained therein. By grouping data, we can perform aggregate functions like COUNT, SUM, AVG and MAX on the grouped fields. Grouping helps us organize our data into specific groups or classes according to our criteria for analysis. For example, if you want to know what class has the highest average score, you can use grouping by class_id in order to calculate this statistic. SQL Query Execution Order Here is a summary of the typical execution order of a SQL query: FROM clause: The FROM clause is executed first and identifies the tables or views from which the data will be retrieved. JOIN clause: If there are any JOIN clauses, they are executed next, joining multiple tables together based on a specified condition. WHERE clause: The WHERE clause is executed next, filtering the data based on the specified condition. GROUP BY clause: If there is a GROUP BY clause, the column by data in following table is grouped based on the specified columns. HAVING clause: The HAVING clause is executed next, filtering the groups based on the specified condition. SELECT clause: The SELECT clause is executed next, selecting the columns that will be displayed in the final query result for the following query set. DISTINCT clause: If there is a DISTINCT clause, duplicates are removed from same results in the same value of the result set. ORDER BY clause: If there is an ORDER BY clause, the data is sorted based on the specified columns. LIMIT clause: If there is a LIMIT clause, the maximum number of rows returned is limited to the specified number two columns. SQL Server GROUP BY And Different Versions Of SQL Server The GROUP BY and clause syntax in SQL Server has evolved over different versions of the software. Here are some notable changes: SQL Server 2000: GROUP BY was introduced in SQL Server 2000. It allowed you to group by expressions or column numbers, but not by column names or aliases. It did not support the GROUPING SETS, CUBE or ROLLUP operators. It supported aggregate functions and the HAVING clause. SQL Server 2005: GROUP BY now supported column aliases. It introduced the COMPUTE and COMPUTE BY clauses, which allowed you to calculate aggregates on subsets of the data. It supported the GROUPING SETS operator, which allowed you to specify multiple grouping sets in a single query. SQL Server 2008: GROUP BY now supported the CUBE and ROLLUP operators, which allowed you to generate subtotals and grand totals for each level of a hierarchy. SQL Server 2012: GROUP BY introduced the GROUPING and GROUPING_ID functions, which allowed you to identify different groups, whether a column was included in a grouping set, and to generate a unique identifier for each column name and group. SQL Server 2016: GROUP BY introduced the GROUPING SETS syntax, which allowed you to specify and combine multiple group grouping sets in a single query using a simpler syntax than the previous COMPUTE BY and GROUP BY ROLLUP and CUBE syntax. SQL Server 2017: GROUP BY added support for the GROUPING SETS WITH ROLLUP and GROUPING SETS WITH CUBE extensions, which allow you to include the ROLLUP and CUBE operators within a GROUPING SETS clause. SQL Server 2019: GROUP BY added support for the GROUPING_WINDOW function, which allowed you to generate running aggregates and other windowed functions based on a single group-by query. Overall, the GROUP BY clause in SQL Server has evolved to become more powerful and flexible over time, allowing for more complex and sophisticated analysis of data. SQL Server GROUP BY Clause With Aggregate Functions An Where Clause The GROUP BY clause in SQL Server is used to group rows that have the same values in one or more columns into summary rows, like computing totals or averages. Aggregate functions are commonly used with the GROUP BY clause to perform calculations on the grouped rows of data. Here are some examples of using the GROUP BY clause and aggregate functions in SQL Server: Here is the T-SQL script to create the "Orders" table in SQL Server, as well as the INSERT statements to populate it with the data from the examples above: CREATE TABLE Orders ( OrderID int PRIMARY KEY, CustomerID varchar(15), OrderDate date, TotalAmount decimal(10,2), OrderCategory varchar(50), OrderSalesPerson varchar(50), CustomerRegion varchar(50) ); INSERT INTO Orders (OrderID, CustomerID, OrderDate, TotalAmount, OrderCategory, OrderSalesPerson, CustomerRegion) VALUES (1, 'ABC-123-2022', '2022-01-01', 100.00, 'Wing', 'Milton Friedman', 'North America'), (2, 'ABC-123-2022', '2022-01-03', 50.00, 'Engine', 'Amartya Sen', 'Europe'), (3, 'DEF-456-2022', '2022-01-04', 75.00, 'Landing Gear', 'John Maynard Keynes', 'North America'), (4, 'DEF-456-2022', '2022-01-06', 125.00, 'Propeller', 'Friedrich Hayek', 'Asia'), (5, 'GHI-789-2022', '2022-01-08', 200.00, 'Fuselage', 'Milton Friedman', 'North America'), (6, 'ABC-123-2023', '2023-02-01', 150.00, 'Wing', 'Amartya Sen', 'North America'), (7, 'ABC-123-2023', '2023-02-05', 75.00, 'Engine', 'John Maynard Keynes', 'Europe'), (8, 'DEF-456-2023', '2023-02-09', 90.00, 'Landing Gear', 'Friedrich Hayek', 'North America'), (9, 'DEF-456-2023', '2023-02-12', 110.00, 'Propeller', 'Milton Friedman', 'Asia'), (10, 'GHI-789-2023', '2023-02-15', 250.00, 'Fuselage', 'Amartya Sen', 'Europe'), (11, 'JKL-012-2023', '2023-03-01', 300.00, 'Wing', 'John Maynard Keynes', 'North America'), (12, 'JKL-012-2023', '2023-03-02', 75.00, 'Engine', 'Friedrich Hayek', 'Europe'), (13, 'MNO-345-2023', '2023-03-03', 50.00, 'Landing Gear', 'Milton Friedman', 'North America'), (14, 'MNO-345-2023', '2023-03-04', 120.00, 'Propeller', 'Amartya Sen', 'Asia'), (15, 'PQR-678-2023', '2023-03-05', 175.00, 'Fuselage', 'John Maynard Keynes', 'North America') This script will create the "Orders" table with the specified columns and data types, and insert the sample data into the table. You can use similar data and column expressions from this table to run the examples I provided earlier using the GROUP BY clause and aggregate functions. Example 1: Get the total amount minimum value of orders per customer. SELECT CustomerID, SUM(TotalAmount) as TotalOrderAmount FROM Orders GROUP BY CustomerID Example 2: Get the number of orders per customer. SELECT CustomerID, COUNT(OrderID) as NumOrders FROM Orders GROUP BY CustomerID Example 3: Get the average order amount per customer. SELECT CustomerID, AVG(TotalAmount) as AvgOrderAmount FROM Orders GROUP BY CustomerID Example 4: Group By Where SQL Here's an example of a GROUP BY query using the WHERE clause with the sample data: SELECT CustomerID, SUM(TotalAmount) as TotalSales FROM Orders WHERE YEAR(OrderDate) = 2022 GROUP BY CustomerID; This query selects the CustomerID and the total sales (TotalAmount) for each customer in the Orders table where the OrderDate year is 2022. The GROUP BY clause groups the results by CustomerID, and the SUM() function calculates the total sales for each customer. The WHERE clause filters the results to only include orders placed in 2022. Compute By Here's an example of using the COMPUTE BY clause in T-SQL with the Orders table: SELECT OrderCategory, OrderSalesPerson, SUM(TotalAmount) AS TotalSales FROM Orders GROUP BY OrderCategory, OrderSalesPerson WITH COMPUTE BY ORDER BY OrderCategory, OrderSalesPerson In this example, we are using the COMPUTE BY clause to add subtotals and a grand total to the result set. The result set will include subtotals for each combination of OrderCategory and OrderSalesPerson, as well as a grand total for all categories and salespersons combined. The result will have the following columns: OrderCategory OrderSalesPerson TotalSales The result will be grouped by OrderCategory and OrderSalesPerson, and the COMPUTE BY clause will add subtotals for each combination of OrderCategory and OrderSalesPerson, as well as a grand total for all categories and salespersons combined. Note that the COMPUTE BY clause can be used with multiple columns in the GROUP BY clause, and can also be combined with the ROLLUP or CUBE clauses to generate more complex subtotals and grand totals. GROUPING SETS You would use GROUPING SETS in T-SQL when you want to group data by multiple combinations of columns. With GROUPING SETS, you can specify multiple groupings in a single query, which allows you to get summary data for multiple levels of granularity in a single result set. For example, suppose you have a sales table with columns for SalesDate, Region, Product, and SalesAmount, and you want to get the total sales for each region and product, as well as the total sales for each region and for all products. You could use GROUPING SETS to achieve this with a single query, like this: SELECT CustomerRegion, OrderCategory, SUM(TotalAmount) as TotalSales FROM Orders GROUP BY GROUPING SETS ((CustomerRegion, OrderCategory), (CustomerRegion), (OrderCategory), ()) ORDER BY CustomerRegion, OrderCategory; The first GROUP BY grouping set (Region, Product) groups the data by both Region and Product, giving you the total sales for each combination of region and product. The second grouping set (Region) groups the data only by Region, giving you the total sales for each region across all products. Using GROUPING SETS allows you to consolidate multiple queries into a single query and get the results in a single result set, which can simplify your code and improve performance. GROUPING SETS with ROLLUP You would use GROUPING SETS with ROLLUP when you want to compute subtotals and grand totals for multiple groupings in a single query. The ROLLUP operator computes the subtotal and grand total rows for each grouping set defined in the GROUPING SETS clause. Here's an example using the same Orders table: SELECT CustomerRegion, OrderCategory, OrderSalesPerson, SUM(TotalAmount) AS TotalSales FROM Orders GROUP BY GROUPING SETS ( (CustomerRegion, OrderCategory, OrderSalesPerson), (CustomerRegion, OrderCategory), (CustomerRegion), () ) WITH ROLLUP; In this example, we're using GROUPING SETS with ROLLUP to generate subtotals and grand totals for each level of aggregation. The GROUPING SETS function is used to specify multiple grouping sets, and the WITH ROLLUP modifier generates additional rows that represent subtotals and grand totals. Group Data By A Query Result A Single Column Suppose we have a table called "Employees" with the following columns: "EmployeeID", "FirstName", "LastName", "Department", and "Salary". We want to group the employees by their department and calculate the average salary for each department. SELECT Department, AVG(Salary) AS AvgSalary FROM Employees GROUP BY Department Explanation: In this example, we group the employees by their "Department" column and calculate the average salary for each department using the AVG() function. Group Data By Multiple Columns Suppose we have a table called "Orders" with the following columns: "OrderID", "CustomerID", "OrderDate", and "TotalAmount". We want to group the orders by both the customer and the year, and calculate the total amount of orders for each combination of customer and year. SELECT CustomerID, YEAR(OrderDate) AS OrderYear, SUM(TotalAmount) AS TotalAmount FROM Orders GROUP BY CustomerID, YEAR(OrderDate) Explanation: In this example, we group the orders by both the "CustomerID" and the "YEAR(OrderDate)" columns, and calculate the total amount of orders for each combination of customer and year using the SUM() function. Group Data By An Expression Suppose we have a table called "Products" with the following columns: "ProductID", "ProductName", "Category", "Price", and "UnitsInStock". We want to group the products by price range and calculate the total number of units in stock for each price range. SELECT CASE WHEN Price < 50 THEN 'Less than 50' WHEN Price BETWEEN 50 AND 100 THEN 'Between 50 and 100' ELSE 'More than 100' END AS PriceRange, SUM(UnitsInStock) AS TotalUnitsInStock FROM Products GROUP BY CASE WHEN Price < 50 THEN 'Less than 50' WHEN Price BETWEEN 50 AND 100 THEN 'Between 50 and 100' ELSE 'More than 100' END Explanation: In this following example below, we use a CASE statement to create an expression that categorizes the products into three price ranges, and then group the products by this same expression together. We calculate the total number of units in stock for each price range using the SUM() function. Limitations When Using GROUP BY There are some limitations when using GROUP BY in T-SQL. Here are a few: Aggregate functions only: The SELECT statement clause can only include aggregate functions or single row or column expressions or columns that are included in the GROUP BY clause. This means you can select statement group by clause but can't select individual rows or columns that are not part of the GROUP BY clause unless they are included in an aggregate function like SUM or COUNT. Non-deterministic functions: Non-deterministic functions like RAND() cannot be used in the GROUP BY clause. NULL values: If there are NULL values in the data, the GROUP BY clause will treat multiple group of them as distinct and unique values. This can lead to unexpected results when counting or summing data. Performance issues: Using GROUP BY on large data sets can be slow and may cause performance issues. It's important to optimize your queries and use indexes to improve performance. Grouping sets limitations: GROUP BY with grouping sets can result in a large number possible combinations of rows being returned, which can impact performance and increase resource usage. Order of execution: The order of execution of the clauses in a query is important. the GROUP BY clause should come after the FROM and WHERE clauses, and before the HAVING and ORDER BY clauses. If the clauses are not in the correct order, the following query then may not produce the expected results. It's important to be aware of these limitations when using GROUP BY in T-SQL and to optimize your queries above query, accordingly. More Information Please See Article #1 Grouping With Having clause
- Setting Failure Alerts and Fail safe Operators on SQL Agent Jobs
Setting up failure emails on jobs can be an important step in ensuring that you are promptly notified of any issues with your jobs. Here are some general steps to set up failure emails on jobs: Determine what email notifications you want to receive: Before setting up failure emails on jobs, you need to determine what email notifications you want to receive. Do you want to receive an email for every job failure, or only for certain types of failures? Do you want to receive an email immediately, or at a certain time each day? Set up a notification system: Once you have determined what email notifications you want to receive, you need to set up a notification system. This can typically be done within the job scheduling software you are using. Most job scheduling software will allow you to set up email notifications for job failures. Configure job failure notifications: Once you have set up your notification system, you need to configure job failure notifications. This typically involves setting up rules that will trigger an email notification when a job fails. You may need to specify the type of failure that will trigger the notification, as well as the email addresses that should receive the notification. Test the notification system: Before relying on your notification system, it is important to test it to ensure that it is working properly. You can do this by deliberately causing a job to fail and verifying that you receive the expected email notification. By setting up failure emails on jobs, you can be alerted to issues with your jobs in a timely manner, which can help you address the issues before they become more serious. To set up a notifier for a job success or failure in SQL Server Agent, you can follow these steps: Open SQL Server Management Studio: Open SQL Server Management Studio and connect to the SQL Server instance that you want to work with. Expand the SQL Server Agent: In the Object Explorer, expand the SQL Server Agent node. Create a new alert: Right-click on the Alerts node and select "New Alert". This will open the "New Alert" dialog box. Configure the alert properties: In the "New Alert" dialog box, enter a name for the alert and configure the conditions that will trigger the alert. For example, you can set the alert to trigger when a job fails or when a job completes successfully. Configure the alert actions: In the same dialog box, select the "Response" tab and click "New". This will open the "New Operator" dialog box. Enter the email address of the person who should receive the alert notification and configure any other settings as necessary. Save the alert: Click "OK" to save the alert. Enable the alert: Right-click on the alert you just created and select "Enable". This will ensure that the alert is active and will trigger notifications when the specified conditions are met. By following these steps, you can set up a notifier for a job success or failure in SQL Server Agent. When the specified conditions are met, an email notification will be sent to the specified email address to alert you of the job status. To Manage Alerts In SSMS Drill Down To Jobs Right Click On Job --> Properties What it I want to Notify More Than One Person You can add multiple e-mail address to the e-mail name of the operator. If you want to notify more than one person for a job success or failure in SQL Server Agent, you can follow these steps: Create an operator: Right-click on the "SQL Server Agent" node in the Object Explorer and select "Operators". In the "Operators" window, right-click and select "New Operator". Enter the name of the operator, and configure the email settings, phone number, pager, etc. for each person who should receive the notification. Add the operator to the alert: Follow the steps outlined in the previous answer to create an alert. In the "New Operator" dialog box, select the operator you just created and click "Add". This will add the operator to the alert so that all of the specified recipients will receive the notification when the alert is triggered. Save and enable the alert: Click "OK" to save the alert and then right-click on the alert and select "Enable" to ensure that the alert is active and will trigger notifications when the specified conditions are met. By creating an operator and adding it to the alert, you can notify multiple people for a job success or failure in SQL Server Agent. All of the specified recipients will receive an email notification when the alert is triggered. Note that each recipient must be separated by a ; not a , How Can I setup A Fail Safe Operator To set up a fail-safe operator for job success or failure in SQL Server Agent, you can follow these steps: Create an operator: Right-click on the "SQL Server Agent" node in the Object Explorer and select "Operators". In the "Operators" window, right-click and select "New Operator". Enter the name of the operator and configure the email settings, phone number, pager, etc. for the fail-safe operator. Configure job notifications: In the Object Explorer, navigate to the Jobs folder and right-click on the job you want to configure. Select "Properties" and go to the "Notifications" page. Add the fail-safe operator: Under "When the job fails", select "Email" and add the fail-safe operator as the recipient. You can also configure additional settings, such as the email subject and message. Save the changes: Click "OK" to save the changes to the job properties. By following these steps, you can set up a fail-safe operator for job success or failure in SQL Server Agent. If the job fails and no other operators are configured to receive notifications, the fail-safe operator will receive an email notification. This ensures that someone is always notified in the event of a job failure. How Can I send SMS text message to a e-mail To send an SMS text message to an email address, you can follow these steps: Identify the recipient's mobile carrier: In order to send an SMS message to an email address, you will need to know the recipient's mobile carrier. This information is necessary because each carrier has its own unique email address format that is used to send SMS messages. Compose your message: Compose your SMS text message as you normally would, keeping in mind that SMS messages are typically limited to 160 characters. Format the email address: To send the SMS message to an email address, you will need to format the email address using the recipient's mobile carrier email address format. The email address format typically looks something like this: <10-digit-phone-number>@. For example, if the recipient's phone number is 555-123-4567 and their carrier is AT&T, the email address would be 5551234567@txt.att.net. Send the message: Once you have formatted the email address correctly, you can send the SMS message as an email to the recipient's email address. Note: It's important to keep in mind that the recipient's mobile carrier may charge them for receiving SMS messages, and standard data rates may apply if they receive the message over a cellular data network rather than Wi-Fi. Other Resources How To Setup Database Mail
- Log Backups For Databases Set To Full Mode
**If you have a database that is set to full mode but does not have Transaction-log backups you need to create or take Transaction-log backups on a regular interval. If you do not perform a Transaction-log backup the log file will grow uncontrollably until you run out of disk.** FULL Recovery Model: This model provides complete backup and recovery of the database, allowing you to restore the database to a specific point in time. With the FULL recovery model, you must perform both full and transaction log backups. Full backups capture the entire database, while transaction log backups capture all the changes made to the database since the last log backup. This model provides the most complete data recovery capability, but it also requires more disk space and more frequent backups. SIMPLE Recovery Model: This model provides the simplest backup and recovery strategy, allowing you to recover the database only to the last full or differential backup. In the SIMPLE recovery model, you only need to perform full or differential backups, and transaction log backups are not required. The transaction log is truncated automatically, which means that the log space is reused as new transactions are written to the log. This model provides less data recovery capability than the FULL recovery model, but it requires less disk space and fewer backups. To summarize, the FULL recovery model requires both full and transaction log backups, while the SIMPLE recovery model only requires full or differential backups. The choice between the two models depends on the business requirements for data recovery, the frequency of changes made to the database, and the available disk space for backup storage. Full Recovery Mode - T-Log Details In SQL Server, a log backup is a type of backup that captures all the transactions and modifications made to a database since the last log backup or the creation of the database. It essentially takes a snapshot of the transaction log, which records all the changes made to the database. Log backups are incremental backups and are designed to work in conjunction with full or differential backups. Full backups capture the entire database, while differential backups capture the changes since the last full backup. Log backups capture the changes since the last log backup or database creation. The primary purpose of log backups is to enable point-in-time recovery of a database. This means that you can restore a database to a specific point in time by restoring a full backup, any applicable differential backups, and one or more log backups up to the point in time you want to restore. Log backups can be scheduled to run at regular intervals, such as every 10 minutes, every hour, or once a day, depending on the transaction volume of the database and the acceptable data loss in case of a failure. In addition, log backups can be compressed and encrypted for security and space-saving purposes. How To Perform A Log Backup To perform a log backup in T-SQL, you can use the BACKUP LOG statement. Here is the basic syntax: BACKUP LOG database_name TO backup_device [ ,...n ][ WITH options ] Here is a brief explanation of each element of the syntax: BACKUP LOG specifies that you want to perform a log backup. database_name is the name of the database you want to back up. TO backup_device specifies the location where you want to store the backup. You can use a disk, tape, or other backup device. [ ,...n ] specifies additional backup devices, separated by commas. WITH options specifies additional options for the backup. Some commonly used options include INIT (to initialize the backup device), SKIP (to skip over any log records that have already been backed up), and NO_TRUNCATE (to prevent the transaction log from being truncated after the backup is complete). To write a log backup with a file name of "DatabaseName-date-hours-minutes" in T-SQL, you can use the following code: BACKUP LOG [DatabaseName] TO DISK = 'C:\Backups\DatabaseName-' + CONVERT(VARCHAR(20), GETDATE(), 112) + '-' + REPLACE(CONVERT(VARCHAR(20), GETDATE(), 108), ':', '') + '.trn' In this code, the BACKUP LOG statement is used to initiate a log backup for the specified database (DatabaseName). The TO DISK clause specifies the file path and name for the backup file. The CONVERT function is used to format the current date and time into the desired format. The GETDATE() function retrieves the current date and time, and the 112 and 108 arguments are used to specify the date and time formats, respectively. The REPLACE function is used to remove the colons from the time portion of the date/time string, as colons are not allowed in file names. Note that you should replace C:\Backups with the actual path where you want to store your backups. Example To Loop Though Each DB and Take A Log Backup To backup the logs for every database on the server, you can use the sp_MSforeachdb stored procedure along with the BACKUP LOG statement. Here is an example T-SQL script: EXECUTE master.sys.sp_MSforeachdb 'IF ''?'' NOT IN (''master'', ''tempdb'', ''model'', ''msdb'') BEGIN DECLARE @backupFileName NVARCHAR(500) SET @backupFileName = N''C:\SQLBackups\' + REPLACE(''?'', '', '') + N'_LogBackup_' + REPLACE(CONVERT(VARCHAR(10), GETDATE(), 111), '''', '''') + N'.bak'' BACKUP LOG [?] TO DISK = @backupFileName More Information About Log Backups
- What Are The Different Versions Of SQL Server?
Microsoft SQL Server is a relational database management system (RDBMS) that is used to store, retrieve, and manage data. It is available in several different versions, including: SQL Server Enterprise: This is the top-tier edition of SQL Server and is designed for mission-critical applications and high-end data warehousing. It includes a range of advanced features and capabilities, such as support for in-memory processing, data warehousing, and advanced security. SQL Server Standard: This is the mid-level edition of SQL Server and is designed for departments and small to medium-sized businesses. It includes a range of features and capabilities for data management and business intelligence. SQL Server Web: This is a low-cost edition of SQL Server that is designed for web-based applications. It includes a subset of the features and capabilities of the Standard edition. SQL Server Express: This is a free edition of SQL Server that is designed for developers and small organizations. It includes a subset of the features and capabilities of the Standard edition and is limited to 10 GB of data storage. SQL Server Developer: This is a fully-featured edition of SQL Server that is available to developers at no cost. It includes all of the features and capabilities of the Enterprise edition and can be used for development and testing purposes. SQL Server Enterprise is the top-tier edition of SQL Server and is designed for mission-critical applications and high-end data warehousing. It includes a range of advanced features and capabilities that are not available in the Standard and Web editions of SQL Server. Here are some of the key features of SQL Server Enterprise: In-memory OLTP: This is a feature that allows you to create memory-optimized tables and stored procedures, which can improve the performance of transactional workloads. Data warehousing: This is a set of features that are optimized for data warehousing and business intelligence workloads, including columnstore indexes, partitioning, and data compression. Advanced security: This is a set of features that provide enhanced security for SQL Server, including data masking, transparent data encryption, and auditing. Advanced analytics: This is a set of features that allow you to perform advanced analytics on your data, including support for advanced machine learning algorithms and data mining. Hybrid scenarios: This is a set of features that allow you to use SQL Server in hybrid scenarios, such as replicating data to the cloud or using Azure Machine Learning to build predictive models. High availability: This is a set of features that allow you to achieve high availability for your SQL Server deployment, including failover clustering, database mirroring, and replication. SQL Server Standard is a mid-level edition of SQL Server and is designed for departments and small to medium-sized businesses. It includes a range of features and capabilities for data management and business intelligence, including some features that are not available in the Web edition of SQL Server. Here are some of the key features of SQL Server Standard: Data warehousing: This is a set of features that are optimized for data warehousing and business intelligence workloads, including columnstore indexes, partitioning, and data compression. Advanced security: This is a set of features that provide enhanced security for SQL Server, including data masking, transparent data encryption, and auditing. High availability: This is a set of features that allow you to achieve high availability for your SQL Server deployment, including failover clustering, database mirroring, and replication. In-memory OLTP: This is a feature that allows you to create memory-optimized tables and stored procedures, which can improve the performance of transactional workloads. Advanced analytics: This is a set of features that allow you to perform advanced analytics on your data, including support for advanced machine learning algorithms and data mining. Data integration: This is a set of features that allow you to integrate data from a variety of sources, including support for extract, transform, and load (ETL) operations with SQL Server Integration Services (SSIS). is a mid-level edition of SQL Server and is designed for departments and small to medium-sized businesses. It includes a range of features and capabilities for data management and business intelligence, including some features that are not available in the Web edition of SQL Server. SQL Server Web is a low-cost edition of SQL Server that is designed for web-based applications. It includes a subset of the features and capabilities of the Standard edition, and is licensed on a per-user basis. Here are some of the key features of SQL Server Web: Data warehousing: This is a set of features that are optimized for data warehousing and business intelligence workloads, including columnstore indexes, partitioning, and data compression. Advanced security: This is a set of features that provide enhanced security for SQL Server, including data masking, transparent data encryption, and auditing. Data integration: This is a set of features that allow you to integrate data from a variety of sources, including support for extract, transform, and load (ETL) operations with SQL Server Integration Services (SSIS). In-memory OLTP: This is a feature that allows you to create memory-optimized tables and stored procedures, which can improve the performance of transactional workloads. Advanced analytics: This is a set of features that allow you to perform advanced analytics on your data, including support for advanced machine learning algorithms and data mining. Scalability: This is a set of features that allow you to scale out your SQL Server deployment to meet the needs of your application, including support for distributed queries and multiple instances of SQL Server. SQL Server Express is a free edition of SQL Server that is designed for developers and small organizations. It includes a subset of the features and capabilities of the Standard edition and is limited to 10 GB of data storage. Here are some of the main limits and drawbacks of using SQL Server Express: Data storage: SQL Server Express is limited to 10 GB of data storage, which may not be sufficient for larger organizations or applications with high data storage needs. Memory and CPU usage: SQL Server Express is limited to using a maximum of 1 GB of memory and 1 CPU core, which may not be sufficient for applications with high resource usage requirements. Advanced features: SQL Server Express does not include some of the advanced features and capabilities of the Standard and Enterprise editions, such as support for in-memory processing, data warehousing, and advanced security. Backups: SQL Server Express does not include support for scheduled backups or the ability to perform transaction log backups. Replication: SQL Server Express does not include support for replication, which is the process of copying data between databases. Despite these limitations, SQL Server Express can be a useful tool for developers and small organizations who need a lightweight and easy-to-use database management system.
- What Is A SQL Server DBA?
A SQL Server Database Administrator (DBA) is responsible for the design, implementation, maintenance, and performance of a SQL Server database. They are responsible for ensuring that the database is available, secure, and performing well. Some of the main responsibilities of a SQL Server DBA include: Installing and configuring SQL Server: The DBA will install and configure SQL Server, including setting up security, backup and recovery, and monitoring. Designing and creating databases: The DBA will work with developers and other stakeholders to design and create databases that are optimized for performance and scalability. Managing and maintaining databases: The DBA will be responsible for maintaining the databases, including troubleshooting and resolving issues, monitoring performance, and optimizing the database. Backup and Recovery: The DBA will ensure that regular backups are taken and that a disaster recovery plan is in place. They will also test the recovery process to ensure that it works as expected. Security: The DBA will be responsible for ensuring that the database is secure, by implementing security best practices and monitoring for security breaches. Performance tuning: The DBA will be responsible for monitoring and optimizing the performance of the database, identifying and resolving performance bottlenecks, and implementing performance-enhancing features such as indexing and partitioning. Upgrades and patches: The DBA will be responsible for testing and applying upgrades and patches to the SQL Server software and related tools. Compliance: The DBA will be responsible for ensuring that the database is compliant with industry standards and regulations. Automation: The DBA will be responsible for automating repetitive tasks to improve efficiency and reduce human error. Mentoring and training: The DBA will be responsible for mentoring and training other members of the IT team on SQL Server and related technologies. It's important to note that the specific responsibilities of a SQL Server DBA will depend on the size and complexity of the organization, and the specific requirements of the role. The average pay for a SQL Server DBA can vary depending on several factors such as location, experience, and qualifications. According to the US Bureau of Labor Statistics, the median annual salary for database administrators, including SQL Server DBAs, was $92,030 in May 2020. The top 10 percent earned more than $142,530, and the bottom 10 percent earned less than $62,430. According to Payscale, the average salary for a SQL Server DBA in the United States as of January 2021 is $78,823 per year. The pay for a SQL Server DBA can vary depending on the state. According to Indeed, the states with the highest average salary for SQL Server DBAs in the United States as of January 2021 are: California: $119,000 New York: $110,000 Washington: $107,000 Illinois: $104,000 Massachusetts: $103,000 It's important to note that the data is based on the salary reports of some websites, and it can vary depending on the source, the job posting, the company and the region within a state. Also, the salary can be affected by other factors like experience, qualifications, and the type of industry. It's recommended to check for the most recent data and to consider other factors that may affect the salary when evaluating the pay for a SQL Server DBA role. Being a SQL Server Database Administrator (DBA) is a challenging and rewarding role, but it also has its share of drawbacks and difficulties. Some of the worst parts of being a SQL Server DBA include: On-call responsibilities: DBAs may be required to be on call outside of regular business hours to troubleshoot and resolve issues with the database, which can be disruptive to their personal lives. High stress: DBAs are responsible for ensuring that the database is available, secure, and performing well, which can be a high-stress job, especially when dealing with critical issues or outages. Constant learning and adaptation: The technology and best practices of SQL Server are constantly evolving, which means that DBAs must continuously learn and adapt to stay up-to-date. Working with limited resources: DBAs are often working with limited resources, such as budget and personnel, which can make it challenging to implement new features or resolve issues. Lack of Recognition: DBAs often work behind the scenes to keep databases running, and their contributions may not be fully recognized by other members of the organization. Limited opportunities for career advancement: Some companies may have limited opportunities for career advancement for DBAs, and they may find it difficult to advance to a higher level of management. Security: The Database administrator is responsible for securing data and access to it, being a DBA means also being responsible for preventing unauthorized access, data breaches and ensuring compliance with regulations. It's important to note that these challenges can vary depending on the specific organization and the DBA's role within it. Additionally, these challenges can be mitigated with the right team, management and the right mindset.
- Defining, Connecting and Installing SQL Server Management Studio SSMS
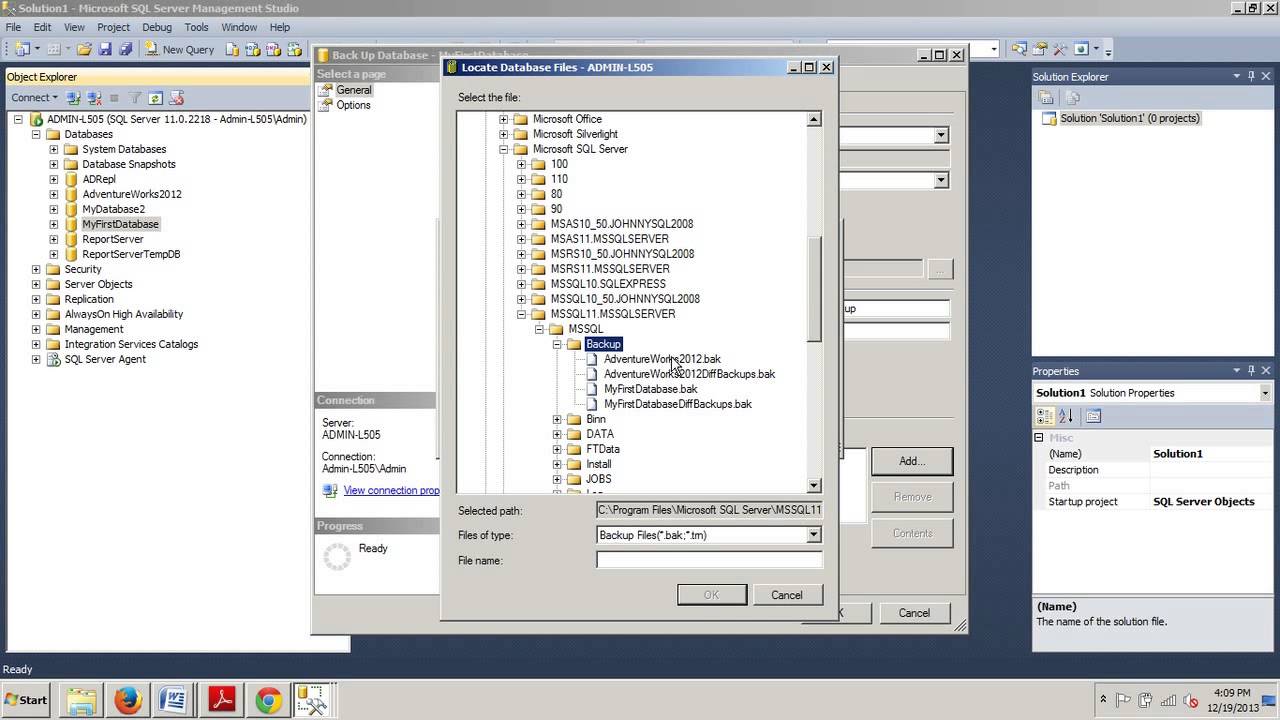
Index - Quick Links In This Document What Is SQL Server Management Studio Installing SQL Server Management Studio Connecting To A Remote Server With SQL Server Management Studio Connect Two SQL instances, Azure and On-Prem Grid Vs Text Output Backup And Restore Setup Dark Mode Database Diagram Query Builder Script Tables Drag and Drop A Good PDF Book On SSMS What Is SQL Server Management Studio SQL Server Management Studio (SSMS) is a software application from Microsoft that is used for configuring, managing and administering all components within Microsoft SQL Server. It provides a graphical interface for connecting to and working with SQL Server databases, as well as the ability to write and execute SQL queries and scripts. SSMS also includes a variety of tools for managing and troubleshooting SQL Server, including the ability to back up and restore databases, manage security and permissions, and monitor the performance of the server. SQL Server Management Studio (SSMS) is a feature-rich tool for managing and administering SQL Server databases. Some of its key features include: Connection management: SSMS provides a graphical interface for connecting to SQL Server instances and working with databases. It supports multiple connections, and allows you to easily switch between them. Query editing and execution: SSMS includes a built-in query editor that supports syntax highlighting, IntelliSense, and code snippets. It also has the ability to execute queries and scripts and display the results in a grid or text format. Backup and restore: SSMS provides tools for backing up and restoring databases, including the ability to create full, differential, and transaction log backups. It also allows you to schedule backups and manage backup files. Security and permissions management: SSMS provides tools for managing security and permissions on SQL Server instances and databases. It allows you to create and manage logins, users, and roles, as well as assign permissions to specific objects in a database. Performance monitoring: SSMS includes tools for monitoring the performance of SQL Server instances and databases, including the ability to view real-time performance data, as well as create and manage performance baselines. Data management: SSMS provides a wide range of data management capabilities, including the ability to view and edit data in tables and views, create and modify database objects like tables, views, stored procedures and functions. Reporting and analysis: SSMS includes several reporting and analysis tools that allow you to create and view reports on the data stored in SQL Server databases. Integrations and Automation : SSMS allows integration with other tools like SQL Agent for scheduling jobs, and also supports automation with PowerShell or SQL scripts. SQL Server Management Studio (SSMS) includes several built-in reports that provide detailed information about the performance, configuration, and usage of SQL Server instances and databases. Some of the reports that are included with SSMS include: Performance reports: These reports provide information about the performance of SQL Server, including the ability to view real-time performance data, as well as create and manage performance baselines. Some examples of performance reports are: Activity - All Blocking Transactions, Activity - All Sessions and Activity - Top Transactions by Average CPU Time Disk Usage reports: These reports provide information about the disk space usage of SQL Server databases, including the size of data and log files, as well as the amount of free space available on the server. Security reports: These reports provide information about the security settings and permissions of SQL Server instances and databases, including the ability to view and manage logins, users, and roles. Job reports: These reports provide information about the status and history of SQL Server Agent jobs, including the ability to view the schedule, duration, and outcome of each job. Data Collection reports: These reports provide information about the data collection sets and the collected data, including the ability to view and manage data collection sets, and view the collected data. Database reports: These reports provide detailed information about the databases hosted on SQL Server, including the ability to view the size, status, and schema of each database. SQL Server Management Studio (SSMS) is a powerful tool for managing and administering SQL Server databases, but it also has some negative aspects that users should be aware of: It takes forever to load and install! Resource intensive: SSMS can be resource intensive, particularly when working with large or complex databases. It may consume a lot of system resources, such as memory and CPU, which can slow down your computer or cause it to become unresponsive. Complexity: SSMS can be complex to navigate, particularly for users who are not familiar with the tool or SQL Server in general. It has a lot of features and options, which can be overwhelming for some users. Limited Support for other Database platforms: SSMS is primarily designed for managing SQL Server databases, so it may not be the best choice for users who need to work with other database platforms, such as MySQL or PostgreSQL. Limited Integration with Other tools : SSMS may not have the best integration with other tools like source control, or automation tools, which can make it difficult to collaborate with other team members or automate repetitive tasks. UI: SSMS has a traditional Windows application interface, which some users may find outdated or not very user-friendly. Some users may prefer a more modern and streamlined interface like Azure Data Studio. You can download SQL download SQL Server Management Studio here Installing SQL Server Management Studio To install SQL Server Management Studio (SSMS), you will need to follow these steps: Download the SSMS installation file from the Microsoft website. Double-click the installation file to begin the installation process. Follow the prompts in the setup wizard to install SSMS on your computer. Once the installation is complete, you can launch SSMS from the Start menu or the desktop shortcut. Let's Go Thorugh Each Step Of The Setup Process. After double-clicking the install file --> Yes Click Install Click Close Connecting To A Remote Server With SQL Server Management Studio Method 1 Launch the SQL Server Management Studio. You will get the Connect to Server dialog box. type in Locahost Once you connect you can create a new query and Select @@Servername Method 2 - Browsing For Server Name Open SSMS and connect to your local instance of SQL Server. In the Object Explorer pane on the left, expand the Server Name node. Right-click the Server Name node and select "Connect Object Explorer." In the Connect to Server window, select "Browse for more" in the "Server name" field. In the Browse for Servers window, you will see a list of available servers on your network. Select the server that you want to connect to and click "Connect." If the server requires authentication, you will be prompted to enter your login credentials. Once you are connected, the server name will be displayed in the Object Explorer pane and you can browse and manage the database objects on the server. Method 3 - Use SQLCMD Using the command line and SQLCMD SQLCMD is a command-line utility in SQL Server that allows you to execute Transact-SQL statements and scripts from the command prompt. It is useful for automating tasks, such as deploying databases or running scripts on multiple servers, and for troubleshooting and diagnosing issues with SQL Server. To use SQLCMD, you will need to open a command prompt and type "sqlcmd" followed by the appropriate arguments and options. For example, to connect to a SQL Server instance and run a query sqlcmd -L Method 4 - Use SQL Configuration Manager SQL Server Configuration Manager is a tool that allows you to manage and configure SQL Server services, network protocols, and client connectivity options. It is installed with SQL Server and is available on the Start menu under Microsoft SQL Server Tools. Some of the key tasks that you can perform using SQL Server Configuration Manager include: Starting and stopping SQL Server services Changing the startup type of SQL Server services Configuring network protocols and client connectivity options Enabling or disabling network protocols Changing the port number used by a network protocol You can also use SQL Server Configuration Manager to view the status of SQL Server services and to view error logs and other diagnostic information. Setup SQL Server Management Studio (SSMS) Dark Theme SQL Server Management Studio (SSMS) is a software application from Microsoft that is used to manage and administer SQL Server databases. "Dark Mode" is a feature or theme that changes the color scheme of the user interface to a darker color palette, which can make it easier on the eyes when working in dimly lit environments. SSMS 18 supports several themes including, blue and light by default. SSMS, the Dark Mode, changes the background color of the interface from white to black, nd the text color from black to white, you must edit the config; you file to enable this setting. The config file is at this location - remove the // before Remove Dark Theme and before the $[Rootkey$ C:\Program Files (x86)\Microsoft SQL Server Management Studio 18\Common7\IDE Once you have coedited the config file you should see a new "Dark" option Here are a few 30 SecondVideo Demomstatring SSMS Second Connect Two SQL instances, Azure and On-Prem Grid Vs Text Output For A T-SQL Query A Quick And Dirty Backup Creating A Simple Database Diagram With Two Tables Creating a Simple Query With The Query Builder How To Script Out All The Tables In A Database Demonstration of SSMS Drag and Drop Capabilities
- Microsoft SQL Server Versions Features And Pricing
If you're a DBA or IT professional and your job involves using SQL Server, then you’ve likely encountered the challenge of selecting the right version for your organisation. With SQL Server currently in its 22nd major version - each with different features and capabilities - understanding which option is suitable for which project can be daunting. But don’t worry! In this blog post we'll give you a comprehensive overview of all the latest versions of Microsoft SQL Server to help you make informed decisions about your team's technology stack. Introducing the Different SQL Server Versions The diverse array of SQL Server versions available today represents the impressive evolution and robust capabilities of this highly sought-after relational database management system. As a critical component in the realm of data management, understanding the distinctions among various SQL Server iterations will empower businesses to harness the appropriate features and functionalities critical to their success. By exploring key aspects such as performance, scalability, and security, one can better comprehend the value of each version and ultimately identify the ideal system to meet the organization's stringent data requirements. From feature-rich editions tailored for large scale deployment to cost-effective, streamlined solutions for small or medium-sized enterprises, the SQL Server landscape is teeming with opportunities to optimize data management strategies for businesses across the globe. Here is an overview of the main features and improvements introduced in different versions of SQL Server: SQL Server 2019: Intelligent query processing features such as batch mode on rowstore and table variable deferred compilation In-memory technologies for optimized performance and scalability Enhanced security with Always Encrypted with secure enclaves and Data Discovery and Classification Big data clusters with integrated Apache Spark and Hadoop Distributed File System (HDFS) storage Support for containers and Kubernetes SQL Server 2017: Cross-platform support for Windows, Linux, and Docker containers Graph database capabilities with support for graph data modeling and analysis Automatic database tuning with Adaptive Query Processing and Automatic Plan Correction Enhanced security with Always Encrypted and SQL Server Audit Resumable online index rebuilds SQL Server 2016: In-memory OLTP with up to 30x faster transaction processing Real-time operational analytics with Always Encrypted Native JSON support and integration with Azure Data Lake Store Enhanced security with Row-Level Security and Dynamic Data Masking Stretch Database for hybrid transactional and analytical processing SQL Server 2014: In-memory OLTP with up to 20x faster transaction processing Enhanced performance and scalability with columnstore indexes AlwaysOn Availability Groups for high availability and disaster recovery Buffer pool extension with SSDs for improved performance Backup encryption and backup to Microsoft Azure SQL Server 2012: AlwaysOn Availability Groups for high availability and disaster recovery Columnstore indexes for enhanced performance and analytics Support for Windows Server Core and PowerShell User-defined server roles and Contained Databases for improved security Sequence objects for reliable number generation SQL Server 2008 R2: Master Data Services for data governance and management StreamInsight for real-time stream processing SQL Server PowerPivot for self-service BI Multi-Server Management for easier administration of multiple servers Transparent Data Encryption for enhanced security SQL Server 2008: Resource Governor for managing and prioritizing workloads Extended events for advanced troubleshooting and monitoring Spatial data support for location-based queries and analysis Change Data Capture for data change tracking Group Policy support for easier administration SQL Server 2005: Common Language Runtime (CLR) integration for enhanced programmability Service Broker for reliable messaging and queuing Database Mirroring for high availability and disaster recovery Dynamic Management Views and Functions for better monitoring and troubleshooting Database Snapshots for point-in-time recovery and reporting SQL Server 2000: Analysis Services for OLAP and data mining Distributed Partitioned Views for distributed queries Indexed Views for enhanced query performance DTS (Data Transformation Services) for ETL (Extract, Transform, Load) English Query for natural language queries Comparing SQL Server Versions and Their Cost Here is a comparison of the SQL Server versions mentioned above and their estimated costs (as of March 2023): SQL Server 2019 Standard Edition: Pricing: Starts at $3,586 for a 2-core license Features: Basic database management capabilities, some BI features Suitable for: Small to medium-sized businesses SQL Server 2019 Enterprise Edition: Pricing: Starts at $13,748 for a 2-core license Features: Advanced features such as high availability, scalability, and security features Suitable for: Large enterprises with high transactional volumes SQL Server 2017 Standard Edition: Pricing: Starts at $3,586 for a 2-core license Features: Basic database management capabilities, some BI features Suitable for: Small to medium-sized businesses SQL Server 2017 Enterprise Edition: Pricing: Starts at $13,748 for a 2-core license Features: Advanced features such as high availability, scalability, and security features Suitable for: Large enterprises with high transactional volumes SQL Server 2016 Standard Edition: Pricing: Starts at $3,586 for a 2-core license Features: In-memory OLTP, Real-time operational analytics, Native JSON support Suitable for: Small to medium-sized businesses SQL Server 2016 Enterprise Edition: Pricing: Starts at $13,748 for a 2-core license Features: In-memory OLTP, Real-time operational analytics, Native JSON support Suitable for: Large enterprises with high transactional volumes SQL Server 2014 Standard Edition: Pricing: Starts at $3,586 for a 2-core license Features: In-memory OLTP, Columnstore indexes, AlwaysOn Availability Groups Suitable for: Small to medium-sized businesses SQL Server 2014 Enterprise Edition: Pricing: Starts at $13,748 for a 2-core license Features: In-memory OLTP, Columnstore indexes, AlwaysOn Availability Groups Suitable for: Large enterprises with high transactional volumes Wrapping Up: A Quick Recap of the SQL Server Versions As we reflect upon the evolution of SQL Server, it is important to acknowledge the significant strides this relational database management system has made since its inception. Originating from the partnership between Microsoft and Sybase in the late 1980s, SQL Server has grown substantially and become an indispensable tool for data management, analytics, and business intelligence. Throughout its progression, there have been several notable versions, each contributing distinct improvements such as enhanced security features, introduction of spatial data types, and the option of deploying to cloud platforms. Ultimately, by understanding the technical advancements and successes of previous SQL Server versions, we can better anticipate the trajectory of this ever-evolving technology and harness its potential to drive data-driven insights within organizations across various industries.
- What is Azure Data Studio
Azure Data Studio (ADS) is a cross-platform data management tool developed by Microsoft. It is built on top of the Visual Studio Code editor and is optimized for cloud-based scenarios. It is designed to provide a streamlined and modern experience for working with SQL Server, Azure SQL Database, and Azure SQL Data Warehouse, as well as other data platforms like MySQL, PostgreSQL, and SQLite. ADS provides a wide range of features that make it easy to work with data, including: Query editing and execution: ADS includes a built-in query editor that supports syntax highlighting, IntelliSense, and code snippets. It also has the ability to execute queries and scripts and display the results in a grid or text format. Backup and restore: ADS provides tools for backing up and restoring databases, including the ability to create full, differential, and transaction log backups. Security and permissions management: ADS provides tools for managing security and permissions on SQL Server instances and databases. It allows you to create and manage logins, users, and roles, as well as assign permissions to specific objects in a database. Data management: ADS provides a wide range of data management capabilities, including the ability to view and edit data in tables and views, create and modify database objects like tables, views, stored procedures and functions. Reporting and analysis: ADS includes several reporting and analysis tools that allow you to create and view reports on the data stored in SQL Server databases. Integrations and Automation : ADS allows integration with other tools like SQL Agent for scheduling jobs, and also supports automation with PowerShell or SQL scripts. Cross-platform support: Azure Data Studio can run on Windows, Linux and Mac, and it supports SQL Server, Azure SQL Database, Azure SQL Data Warehouse, and other data platforms like MySQL, PostgreSQL, and SQLite. Azure Data Studio is a free and open-source tool, which makes it accessible to a wide range of users, and it's lightweight nature makes it easy to use and efficient for everyday tasks. How Is Azure Data Studio Different Than SQL Server Management Studio? Azure Data Studio (ADS) and SQL Server Management Studio (SSMS) are both tools for managing and working with SQL Server databases, but they have some key differences: UI and Experience: SSMS is a traditional Windows application with a more complex interface, while Azure Data Studio has a modern, streamlined interface that is built on top of Visual Studio Code, which is optimized for cloud-based scenarios and other data platforms like MySQL, PostgreSQL, and SQLite. Platform support: SSMS is primarily designed for managing SQL Server databases on Windows, while Azure Data Studio is a cross-platform tool that can run on Windows, Linux and Mac, and also supports SQL Server, Azure SQL Database, Azure SQL Data Warehouse, and other data platforms like MySQL, PostgreSQL, and SQLite. Resource usage: SSMS can be resource intensive, particularly when working with large or complex databases, while Azure Data Studio is more lightweight, which makes it more efficient to use and less likely to slow down the system. Feature set: SSMS is a more feature-rich and powerful tool for managing on-premises SQL Server instances, while Azure Data Studio is more lightweight and focused on data management and query editing. SSMS has many features that are not present in Azure Data Studio, such as backup and restore, security and permissions management, performance monitoring, and more. Cost: SSMS is included with the SQL Server license, while Azure Data Studio is a free and open-source tool. Integration and Automation: SSMS allows integration with other tools like SQL Agent for scheduling jobs, and also supports automation with PowerShell or SQL scripts, while Azure Data Studio also allows integration with other tools and supports automation, but it may have less options than SSMS in this area. In summary, SSMS is a more feature-rich and powerful tool for managing on-premises SQL Server instances, while Azure Data Studio is a more lightweight, cross-platform tool optimized for cloud-based scenarios, other data platforms and has a more modern interface. The choice between the two will depend on the user's needs and preferences. You can download SQL Data Studio Here https://learn.microsoft.com/en-us/sql/azure-data-studio/download-azure-data-studio?view=sql-server-ver16
- Implementing ola hallengren indexing
It is essential for any DBA to understand and know how to implement the proper indexing and backups for their database. Ola Hallengren has created a comprehensive set of scripts designed to assist DBAs in setting up and managing maintenance plans, ensuring optimal performance of their SQL Server databases. This post will provide detailed instructions on how to utilize ola hallengren's IndexOptimizer and Backup scripts, drawing upon workflow background information, so that you can easily integrate these features into your daily operations. Finding index fragmentation In SQL Server To find index fragmentation in SQL Server, you can use the following T-SQL query: SELECT DB_NAME() AS 'Database Name', t.name AS 'Table Name', i.name AS 'Index Name', ips.index_type_desc AS 'Index Type', ips.avg_fragmentation_in_percent AS 'Avg Fragmentation %' FROM sys.dm_db_index_physical_stats(DB_ID(), NULL, NULL, NULL, NULL) ips JOIN sys.tables t ON ips.object_id = t.object_id JOIN sys.indexes i ON ips.object_id = i.object_id AND ips.index_id = i.index_id WHERE ips.index_type_desc NOT IN ('HEAP','CLUSTERED COLUMNSTORE','NONCLUSTERED COLUMNSTORE') AND ips.avg_fragmentation_in_percent > 30 -- or any other fragmentation threshold ORDER BY ips.avg_fragmentation_in_percent DESC This query uses the sys.dm_db_index_physical_stats dynamic management function to return information about index fragmentation for the current database. The DB_ID() function returns the ID of the current database, and the NULL parameters are used to indicate that fragmentation information should be returned for all objects in the database. The JOIN clauses are used to join the sys.dm_db_index_physical_stats results to the sys.tables and sys.indexes system tables, in order to retrieve additional information about the tables and indexes in question. The WHERE clause is used to filter the results, excluding heaps and columnstore indexes, and only showing indexes with fragmentation greater than 30%. You can modify the fragmentation threshold as needed. The results are ordered by average fragmentation percentage in descending order. This query can help identify which indexes are in need of maintenance, such as rebuilding or reorganizing. ALTER INDEX To re-index in T-SQL, you can use the ALTER INDEX statement with the REBUILD option. Here is an example of how to re-index a specific index in a specific table: USE [database_name] GO ALTER INDEX [index_name] ON [schema_name].[table_name] REBUILD; GO To loop through each database and re-index all indexes, you can use a cursor to iterate over the databases and use dynamic SQL to execute the ALTER INDEX statement for each index in each table. Here is an example of how to do this: DECLARE @dbname VARCHAR(255) DECLARE @sql NVARCHAR(MAX) DECLARE db_cursor CURSOR FOR SELECT name FROM sys.databases WHERE name NOT IN ('master', 'tempdb', 'model', 'msdb') OPEN db_cursor FETCH NEXT FROM db_cursor INTO @dbname WHILE @@FETCH_STATUS = 0 BEGIN SET @sql = N'USE ' + QUOTENAME(@dbname) + N'; DECLARE @tablename NVARCHAR(MAX); DECLARE @indexname NVARCHAR(MAX); DECLARE table_cursor CURSOR FOR SELECT QUOTENAME(s.name) + N'.' + QUOTENAME(t.name) FROM sys.tables t INNER JOIN sys.schemas s ON t.schema_id = s.schema_id OPEN table_cursor FETCH NEXT FROM table_cursor INTO @tablename WHILE @@FETCH_STATUS = 0 BEGIN DECLARE index_cursor CURSOR FOR SELECT QUOTENAME(i.name) FROM sys.indexes i WHERE i.object_id = OBJECT_ID(@tablename) OPEN index_cursor FETCH NEXT FROM index_cursor INTO @indexname WHILE @@FETCH_STATUS = 0 BEGIN SET @sql = @sql + N' ALTER INDEX ' + @indexname + ' ON ' + @tablename + ' REBUILD;' FETCH NEXT FROM index_cursor INTO @indexname END CLOSE index_cursor DEALLOCATE index_cursor FETCH NEXT FROM table_cursor INTO @tablename END CLOSE table_cursor DEALLOCATE table_cursor EXEC sp_executesql @sql FETCH NEXT FROM db_cursor INTO @dbname END CLOSE db_cursor DEALLOCATE db_cursor Note that this script will re-index all indexes in all tables in all user databases except for system databases. You can customize it to exclude certain databases or tables if needed. Rebuild vs re-index in SQL Server In SQL Server, "rebuild" and "re-index" both refer to maintenance operations that are performed on database indexes. However, there is a subtle difference between the two: Re-indexing involves dropping and recreating the index, whereas rebuilding an index involves defragmenting the existing index. Rebuilding an index is typically faster than re-indexing, but it requires more free space in the database. Rebuilding an index can also cause a significant increase in disk I/O activity, whereas re-indexing may cause less I/O activity. In general, rebuilding an index is recommended when the index fragmentation level is high (i.e., above 30%), while re-indexing is recommended when the fragmentation level is moderate (i.e., between 10% and 30%). However, the specific choice between rebuilding and re-indexing will depend on various factors, such as the size of the index, the amount of free space in the database, and the availability of resources (e.g., CPU, memory, disk). It's worth noting that index maintenance should be performed regularly to ensure optimal database performance, but it should be done during off-peak hours to minimize the impact on users. The script above does ONLY rebuilds SQL indexes. If you want to dynamically determine if an index needs a rebuild or a re index Ola Hallengren's indexing solution. Ola Hallengren's indexing solution is a popular and widely-used script that provides a comprehensive set of index maintenance operations for SQL Server databases. The solution is available as a free download from Ola Hallengren's website, and it can be customized to fit the specific needs of different database environments. https://ola.hallengren.com/ The indexing solution consists of a set of SQL Server Agent jobs that run on a regular schedule to perform various maintenance tasks, such as rebuilding or reorganizing indexes, updating statistics, and cleaning up old backup files. The solution also includes support for user-defined filegroups and partitions, as well as options for specifying which indexes to include or exclude from maintenance. One of the key benefits of using Ola Hallengren's indexing solution is its flexibility and ease of use. The solution is highly configurable, with many different parameters that can be adjusted to meet specific database requirements. It also provides detailed logging and error handling, which can help administrators diagnose and troubleshoot issues that may arise during index maintenance. Overall, Ola Hallengren's indexing solution is a reliable and efficient tool for managing index maintenance in SQL Server databases. It has become a popular choice among database administrators and is often recommended as a best practice for ensuring optimal database performance. Some of the pros of using Ola Hallengren's indexing solution are: Easy to use: Ola Hallengren's solution is straightforward to implement and use, even for those who are new to database maintenance. Customizable: The solution is highly customizable, allowing you to specify parameters like the databases to be indexed, the types of indexes to be optimized, the schedule, etc. Reliable: Ola Hallengren is a well-known and respected database expert who has been developing and refining his solution for many years. The solution is widely used and has a reputation for being reliable. Comprehensive: The solution includes all the necessary features for managing database indexes, such as rebuilding, reorganizing, updating statistics, and more. However, there are also some potential cons to consider when using Ola Hallengren's indexing solution: Limited support: While the solution is widely used and has a strong user community, support is primarily provided through forums and user groups, rather than through official channels. Complex configurations: While the solution is customizable, some of the configurations can be complex and require a thorough understanding of database indexing and maintenance. No GUI: The solution is command-line based, which may be less convenient for users who prefer a graphical user interface. Overall, Ola Hallengren's indexing solution is a popular and effective choice for automating and managing database indexes, but it may not be the best fit for all users, particularly those who require extensive support or a GUI interface. How to To implement Ola Hallengren's Index solution Download the latest version of the solution from Ola Hallengren's website. Open the downloaded .sql file in SQL Server Management Studio (SSMS). Modify the parameters in the script to suit your environment. Some of the key parameters you may want to customize include: @Databases: A comma-separated list of the databases to be indexed. @Indexes: A comma-separated list of specific indexes to be indexed. @FragmentationLow: The minimum fragmentation level at which indexes will be reorganized. @FragmentationMedium: The minimum fragmentation level at which indexes will be rebuilt. @FragmentationHigh: The minimum fragmentation level at which indexes will be rebuilt with the 'sort in tempdb' option. Execute the modified script in SSMS to create the necessary objects in your database. Schedule a job to run the solution on a regular basis, using SQL Server Agent or another scheduling tool. Monitor the job's progress and adjust the parameters as necessary. By implementing Ola Hallengren's Index solution, you can automate the process of managing database indexes, which can help improve query performance and reduce maintenance overhead. Here's an example of how to implement Ola Hallengren's Index solution in T-SQL: Download the latest version of the solution from Ola Hallengren's website. Open the downloaded .sql file in SQL Server Management Studio (SSMS). Modify the parameters in the script to suit your environment. Here's an example of how to modify some of the key parameters: USE [master] GO EXEC sp_configure 'show advanced options', 1 RECONFIGURE WITH OVERRIDE GO EXEC sp_configure 'max degree of parallelism', 1 RECONFIGURE WITH OVERRIDE GO USE [YourDatabaseName] GO EXECUTE dbo.IndexOptimize @Databases = 'USER_DATABASES', @FragmentationLow = NULL, @FragmentationMedium = 'INDEX_REORGANIZE,INDEX_REBUILD_ONLINE,INDEX_REBUILD_OFFLINE', @FragmentationHigh = 'INDEX_REBUILD_ONLINE,INDEX_REBUILD_OFFLINE', @FragmentationLevel1 = 5, @FragmentationLevel2 = 30, @LogToTable = 'Y' GO Execute the modified script in SSMS to create the necessary objects in your database. Schedule a job to run the solution on a regular basis, using SQL Server Agent or another scheduling tool. Monitor the job's progress and adjust the parameters as necessary. This example sets the parameters to optimize all user databases, rebuild indexes with high fragmentation levels online or offline, and log the results to a table. You can modify the parameters to suit your specific needs. How long will indexing take The time it takes to perform indexing in SQL Server will depend on several factors, such as the size of the database, the number and size of the indexes being created or rebuilt, the fragmentation level of the existing indexes, the available hardware resources (e.g., CPU, memory, disk I/O), and the workload on the server. In general, indexing operations can take anywhere from a few minutes to several hours, or even days in some cases, depending on the size and complexity of the database. Rebuilding a large index or a large number of indexes, for example, can take longer than rebuilding smaller indexes. Similarly, the time it takes to create a new index can depend on the size and complexity of the table being indexed. To get a better estimate of how long indexing will take in a specific database environment, it's a good idea to perform a test run on a non-production system. This can help identify any potential issues or bottlenecks that may affect indexing performance, and it can also provide a baseline for estimating how long indexing will take in a production environment. It's also important to note that indexing operations can impact database performance, particularly during the actual indexing process. As such, it's often recommended to schedule index maintenance during off-peak hours or times of low database activity to minimize the impact on users. Can I re-index during production hours? Re-indexing during production hours can impact database performance and cause increased CPU, memory, and disk I/O activity. Therefore, it's generally recommended to perform index maintenance during off-peak hours or times of low database activity to minimize the impact on users. However, in some cases, it may be necessary to perform index maintenance during production hours due to business requirements or other constraints. In such cases, it's important to carefully plan and schedule the index maintenance operations to minimize their impact on users. Some strategies to consider when performing index maintenance during production hours include: Use a phased approach: Rather than rebuilding or re-indexing all indexes at once, consider breaking the process into smaller, more manageable batches. This can help minimize the impact on database performance and user activity. Monitor performance: Keep a close eye on database performance metrics, such as CPU utilization, memory usage, and disk I/O activity, during the index maintenance process. If performance issues arise, consider adjusting the index maintenance settings or throttling the process to reduce its impact. Communicate with users: Make sure to communicate the planned index maintenance to users in advance, and provide updates as the process progresses. This can help manage expectations and minimize the impact of the index maintenance on users. Overall, while it's generally recommended to perform index maintenance during off-peak hours, it may be possible to perform maintenance during production hours with careful planning and monitoring. In conclusion, indexing in SQL Server can be an important part of maintaining database performance and reliability. Depending on the size and complexity of the database, indexing operations can take anywhere from a few minutes to several hours or even days. To get a better estimate of how long indexing will take in a specific environment, it’s a good idea to perform a test run on a non-production system. Additionally, it’s important to note that indexing operations can impact database performance, so it’s generally recommended to schedule index maintenance during off-peak hours or times of low database activity. However, in some cases, it may be necessary to perform index maintenance
- What Is the CPU Scheduler In SQL Server
As a DBA, understanding the CPU scheduler in SQL Server is essential for ensuring that your databases are running efficiently and effectively. The CPU scheduler is one of the core components of an operating system's processor management options, and as such plays an important role in how queries are processed and handled. In this blog post, we’ll review what exactly the CPU Scheduler does in a SQL Server environment. Introducing the CPU Scheduler in SQL Server The CPU Scheduler in SQL Server is a pivotal component in the optimization of your database's performance, as it meticulously processes and sequences workload execution to maximize the utilization of computing resources. In SQL Server, the CPU scheduler is a component of the SQL Server Database Engine that manages the allocation of CPU resources to SQL Server worker threads. It determines which thread should run on which CPU and for how long. SQL Server uses a cooperative, preemptive scheduling algorithm to manage its worker threads. The scheduler assigns each worker thread a priority based on the type of work it is performing, and uses a time-slicing mechanism to ensure that each thread gets a fair share of CPU resources. The CPU scheduler is responsible for managing both system schedulers and worker schedulers. System schedulers are used to manage background tasks and system threads, while worker schedulers are used to manage user threads that execute SQL statements. The number of worker schedulers that SQL Server uses is determined by the max degree of parallelism setting, which controls the maximum number of CPUs that can be used for parallel query execution. By default, SQL Server creates one worker scheduler per logical CPU, up to a maximum of 64 worker schedulers. The CPU scheduler is a critical component of SQL Server's performance and scalability. It ensures that SQL Server can efficiently utilize available CPU resources to process user requests, while minimizing contention and ensuring fairness. Properly configuring SQL Server's CPU settings can help ensure optimal performance and scalability for your SQL Server environment. Exploring the Benefits of Using a CPU Scheduler in SQL Server The CPU scheduler in SQL Server offers several benefits for database administrators and users. Here are some of the key benefits: Efficient CPU utilization: The CPU scheduler ensures that CPU resources are used efficiently by assigning tasks to idle CPUs and preventing tasks from monopolizing CPU resources. This leads to improved performance and reduced contention for CPU resources. Load balancing: The CPU scheduler balances the workload across available CPUs to ensure that all CPUs are utilized as evenly as possible. This helps to prevent overloading of individual CPUs and improves overall system performance. Improved parallelism: The CPU scheduler allows for parallel execution of SQL statements, which can significantly improve performance for large or complex queries. By dividing the workload across multiple CPUs, parallel execution can reduce query execution time and improve overall system throughput. Fairness and priority: The CPU scheduler assigns priorities to SQL Server threads based on their workload and importance, which ensures that critical tasks are given higher priority than non-critical tasks. This helps to ensure fairness and prevent lower-priority tasks from monopolizing CPU resources. Scalability: The CPU scheduler can scale to support large numbers of CPUs and threads, making it suitable for high-volume environments with heavy workloads. By efficiently utilizing available CPU resources, the CPU scheduler can help ensure that SQL Server can handle increasing workload demands without sacrificing performance. Examining How the CPU Scheduler Works in SQL Server In SQL Server, the CPU scheduler is responsible for managing the allocation of CPU resources to SQL Server worker threads. Here's how the CPU scheduler works in SQL Server: Worker thread creation: When a new user request is received, SQL Server creates a new worker thread to execute the request. Each worker thread is assigned a unique identifier, or scheduler ID. Task queueing: As requests are received, the worker threads are queued up in a task queue. Each task queue is associated with a specific scheduler. Scheduler activation: When a CPU becomes available, the CPU scheduler activates a scheduler that has a worker thread waiting in its associated task queue. The scheduler then assigns the waiting worker thread to the available CPU. Time slicing: The CPU scheduler uses a time-slicing algorithm to ensure that each worker thread gets a fair share of CPU resources. Each thread is assigned a quantum, or time slice, during which it can execute on the CPU. Priority assignment: The CPU scheduler assigns priorities to worker threads based on the type of work they are performing. Higher-priority threads are given more CPU time than lower-priority threads. Load balancing: The CPU scheduler balances the workload across all available CPUs to ensure that all CPUs are being used as evenly as possible. This helps to prevent overloading of individual CPUs and improves overall system performance. Parallelism: When executing large or complex queries, SQL Server can use multiple worker threads in parallel to process different parts of the query. The CPU scheduler assigns each parallel worker thread to a different CPU to maximize parallelism and improve query performance. Overall, the CPU scheduler in SQL Server is a sophisticated system that manages the allocation of CPU resources to SQL Server worker threads. By efficiently assigning priorities, balancing the workload, and maximizing parallelism, the CPU scheduler helps to ensure that SQL Server can handle the demands of modern workloads while delivering high performance and scalability. Analyzing Potential Issues with the Use of a CPU Scheduler in SQL Server While the CPU scheduler in SQL Server offers many benefits, there are also potential issues that can arise when using it. Here are some potential issues to consider: Overhead: The CPU scheduler adds some overhead to the SQL Server engine, as it must constantly monitor the workload and allocate CPU resources accordingly. This overhead can reduce performance and scalability in high-volume environments. Contention: In some cases, multiple threads may compete for the same CPU resource, leading to contention and reduced performance. This can occur when there are more threads than available CPUs, or when threads are competing for other system resources like memory or I/O. Priority inversion: If a low-priority thread is holding a resource that a high-priority thread needs, it can lead to priority inversion, where the low-priority thread prevents the high-priority thread from making progress. This can cause performance problems and can be difficult to diagnose. Scheduling anomalies: In some cases, the CPU scheduler may exhibit unexpected behavior, such as deadlocks or thread starvation. These anomalies can be difficult to diagnose and resolve, and may require careful tuning of the SQL Server engine. Configuration issues: The CPU scheduler is highly configurable, and improper configuration can lead to performance problems or unexpected behavior. For example, setting the max degree of parallelism option too high can lead to excessive parallelism and reduced performance, while setting it too low can limit parallelism and scalability. T-SQL Query To See chat CPU Schedulers are online or offline You can use the following T-SQL query to see which CPU schedulers are online or offline: SELECT scheduler_id, is_online FROM sys.dm_os_schedulers WHERE scheduler_id < 255 This query uses the sys.dm_os_schedulers dynamic management view to retrieve information about the schedulers that are currently active in the SQL Server instance. The scheduler_id column contains the ID of each scheduler, and the is_online column indicates whether the scheduler is currently online (1) or offline (0). Note that the scheduler_id values 0-3 are reserved for system schedulers, and values 4-255 are used for worker schedulers. The query excludes scheduler IDs greater than or equal to 255, as these are used for internal purposes and are not relevant for monitoring CPU availability. You can also use the following modified query to get a more readable output: SELECT 'Scheduler ' + CAST(scheduler_id AS VARCHAR(3)) AS Scheduler, CASE is_online WHEN 1 THEN 'Online' ELSE 'Offline' END AS Status FROM sys.dm_os_schedulers WHERE scheduler_id < 255 This query uses a CASE statement to replace the is_online values with the corresponding text ("Online" or "Offline"), and adds a label to the scheduler_id column to make the output more user-friendly Why CPU Schedulers are offline There can be several reasons why CPU schedulers in SQL Server can go offline or online, including: Hardware failure: If a CPU experiences a hardware issue, the associated scheduler may go offline until the issue is resolved. Resource contention: If multiple threads are competing for the same CPU resource, the scheduler may go offline to prevent resource contention and improve overall system performance. Load balancing: The CPU scheduler may go offline to balance the workload across all available CPUs, preventing overloading of individual CPUs and improving overall system performance. Maintenance: During maintenance operations such as applying software updates or rebooting the system, CPU schedulers may go offline temporarily. Licensing issues: If the system is running on a licensed version of SQL Server and the license limit is exceeded, the CPU schedulers may go offline until the license issue is resolved. However, the most common issue is either processor affinity is set incorrectly or you have too many sockets for your edition of SQL Server. VMware Setup When setting up a SQL Server on VMware you have to only give the number of SOCKETS that each version supports. For example, standard edition suports 4 sockets. This would correspond to the number of processors in the VMware new VM wizard. Be sure to set the cors and processes correctly in VMware Processors = Sockets Cores = Sores Edition Limits For SQL Server If this is set up incorrectly you will see, in Task Manager, the first 4 sockets (of a Standard Edition Box) will have a high CPU utilization while the rest of your machine is idle Processor Affinity Processor Affinity is a feature in SQL Server that allows you to assign specific CPUs to SQL Server threads. With Processor Affinity, you can control which CPUs are used by SQL Server, helping to optimize performance and reduce contention. By default, SQL Server uses all available CPUs on the system. However, in some cases, you may want to restrict SQL Server to a specific subset of CPUs. This can be useful in high-volume environments where there are multiple applications running on the same server and resource contention can be an issue. With Processor Affinity, you can specify which CPUs SQL Server should use for various operations, including user connections, backup operations, and other maintenance tasks. This allows you to allocate CPU resources more effectively, reducing contention and improving overall system performance. To configure Processor Affinity in SQL Server, you can use the affinity mask option, which allows you to specify a bit mask representing the available CPUs on the system. For example, if you have a four-CPU system and you want to assign CPUs 0 and 2 to SQL Server, you would use the affinity mask value 0x5 (binary 0101). It's important to note that configuring Processor Affinity requires careful planning and testing, as improper configuration can lead to reduced performance and scalability. It's also important to regularly monitor system performance and adjust the Processor Affinity settings as needed to ensure optimal performance and resource allocation. More information https://learn.microsoft.com/en-us/sql/database-engine/configure-windows/affinity-mask-server-configuration-option?view=sql-server-ver16
- Page Verification Settings In SQL Server
Page verification is a setting in SQL Server that determines how the system checks for and corrects errors in database pages. There are two page verification options in SQL Server: Checksum: This is the default page verification option in SQL Server. With checksum, SQL Server calculates a checksum value for each data page and stores it in the header of the page. When a page is read, the checksum value is recalculated and compared to the stored value. If the values do not match, SQL Server reports an error. Checksum is a page verification option in SQL Server that helps detect and prevent data corruption in database pages. When the checksum page verification option is enabled, SQL Server calculates a checksum value for each data page and stores it in the header of the page. During read operations, SQL Server recalculates the checksum value and compares it to the stored value. If the values do not match, SQL Server reports an error. The checksum value is calculated using a hash algorithm that takes into account the contents of the page. The algorithm is designed to be fast and reliable, and is optimized for detecting most types of page corruption, including disk problems, memory problems, and other hardware issues. The checksum option is the default page verification setting in SQL Server, and it's recommended that you use this option for all databases, especially those that store critical data. Checksum provides a higher level of protection against data corruption compared to the other page verification option, Torn Page Detection, which only detects partial page writes. To set the checksum page verification option for a database, you can use the following T-SQL statement: ALTER DATABASE YourDatabase SET PAGE_VERIFY CHECKSUM; Torn Page Detection: With this option, SQL Server checks for torn pages, which are pages that have been partially written to disk due to an interruption in the write process. Torn pages can result in data loss or corruption. When torn page detection is enabled, SQL Server checks for torn pages during page reads and reports any errors. Torn Page Detection is a page verification option in SQL Server that helps detect partial page writes and other types of minor data corruption. When the Torn Page Detection option is enabled, SQL Server checks the page header for a torn page bit, which indicates whether the page has been written partially. If the torn page bit is set, SQL Server logs an error and tries to read the page again. A torn page is a page that has been only partially written to disk due to a hardware failure or system error. This type of data corruption is relatively rare, but it can occur when a write operation is interrupted before it is completed. The Torn Page Detection option is less reliable than the checksum page verification option, as it only detects partial page writes and not all types of page corruption. However, it's still a useful option to enable, especially if your hardware does not support the faster checksum calculations. To set the Torn Page Detection option for a database, you can use the following T-SQL statement: ALTER DATABASE YourDatabase SET PAGE_VERIFY TORN_PAGE_DETECTION; You can configure the page verification settings at the database level using the ALTER DATABASE statement: ALTER DATABASE [DatabaseName] SET PAGE_VERIFY { CHECKSUM | TORN_PAGE_DETECTION } It's generally recommended to use the checksum page verification option, as it provides greater protection against data corruption and is more reliable than torn page detection. However, torn page detection may be useful in certain scenarios, such as when dealing with legacy applications or databases that cannot be modified to use checksum verification. It's important to regularly monitor page verification errors using system monitoring tools, such as SQL Server Profiler or Performance Monitor, to identify and correct any issues that may arise. Additionally, be sure to periodically test your database backup and recovery processes to ensure that you can restore your data in the event of a page verification error or other data corruption issue. How can I determine what Page Verification SQL Server is using now? You can determine what page verification setting SQL Server is currently using by running the following query: SELECT name, page_verify_option_desc FROM sys.databases WHERE name = 'YourDatabaseName'; Replace "YourDatabaseName" with the name of the database you want to check. This query returns the name of the database and the description of the page verification option that is currently set for the database. The output will look something like this: name | page_verify_option_desc --------------|----------------------- YourDatabaseName | CHECKSUM In this example, the database "YourDatabaseName" is using the CHECKSUM page verification option. If the page verification option is set to TORN_PAGE_DETECTION, the output would indicate that instead. It's important to regularly check your page verification settings and monitor for page verification errors using system monitoring tools, such as SQL Server Profiler or Performance Monitor, to identify and correct any issues that may arise. How can I check Page Verification in SSMS You can check the page verification setting for a SQL Server database using SQL Server Management Studio (SSMS) by following these steps: Open SQL Server Management Studio and connect to the SQL Server instance that hosts the database you want to check. Expand the "Databases" node and select the database you want to check. Right-click the database and select "Properties" from the context menu. In the "Database Properties" dialog box, select the "Options" page. Look for the "Page verify" option under the "Other options" section. The current page verification setting for the database will be displayed next to this option. If the "Page verify" option is set to "Checksum", then the database is currently using the checksum page verification setting. If the option is set to "Torn Page Detection", then the database is currently using the torn page detection page verification setting.